
 660
660
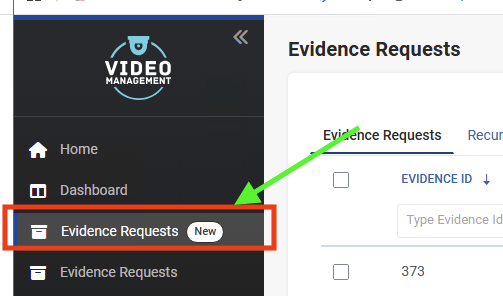
1. Click Evidence Requests (New).
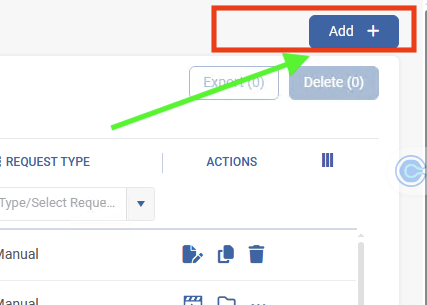
2. Click the Add+ button in the top right corner of the screen.
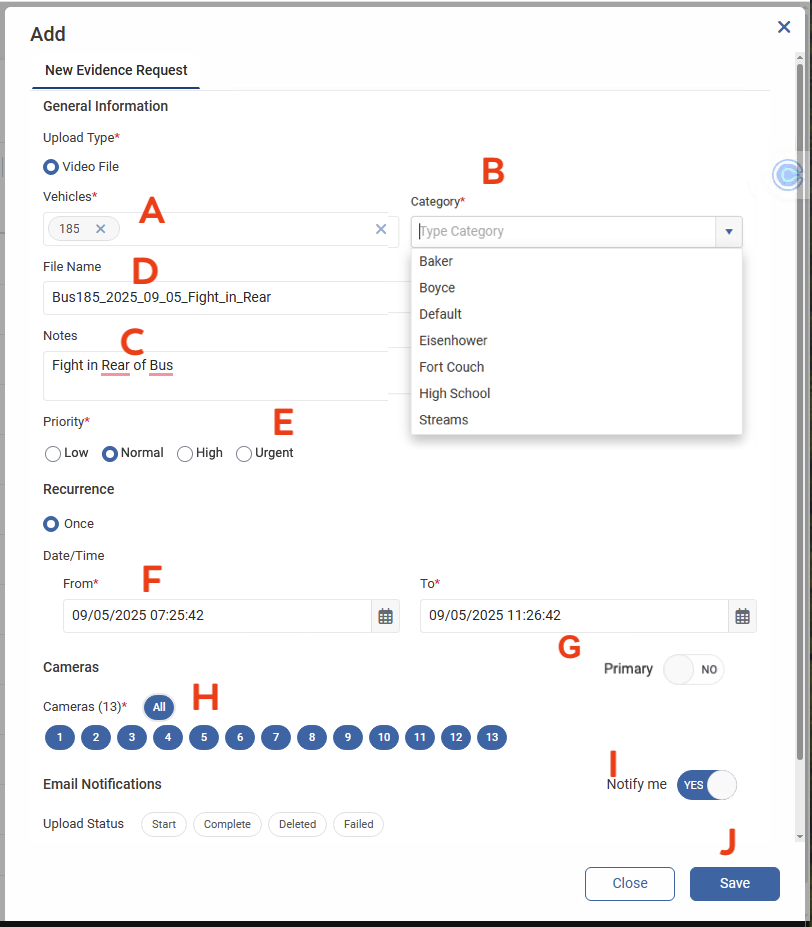
3. Make the following selections from the evidence request menu.
A. In the Vehicles field, enter a bus number, then select the bus number from the listed results
B. Choose the school from the Category list
C. Type a description of the incident in the Notes field
D. Name the file in the format shown below:
BusNumber_Date_Description
Bus197_2025_09_04_Fight_in_Rear_Seat
E. Choose a Priority level (in most cases this should be Normal)
F. Enter the date and time for the requested video in the Date/Time From and To fields
G. Primary to No
H. Choose individual cameras or select All in the Cameras listing
I. Set Notify me to Yes
J. Click Save
4. Once you receive email that the video download from a vehicle is complete, visit the Evidence Request (new). Click on the Open File Location icon.

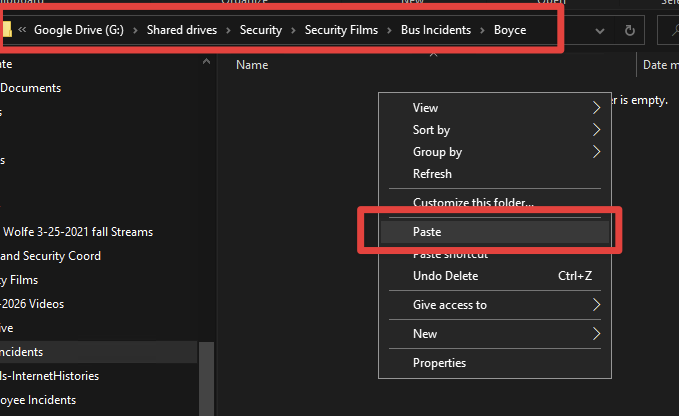
5. This downloaded file is the official archive of the incident. Right-click on the downloaded file, then click Copy.

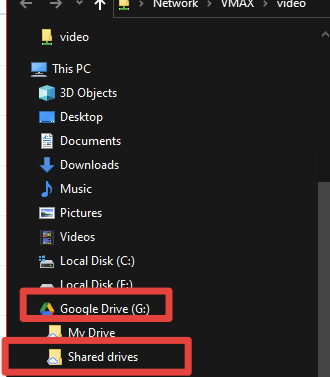
6. On the left side of the screen, go to Google Drive (G:), Shared Drives, Security, Security Films, Bus Incidents, school related to incident, then right-click and click Paste. In this step, you will see a progress bar that indicated how much time is left in your file copy.
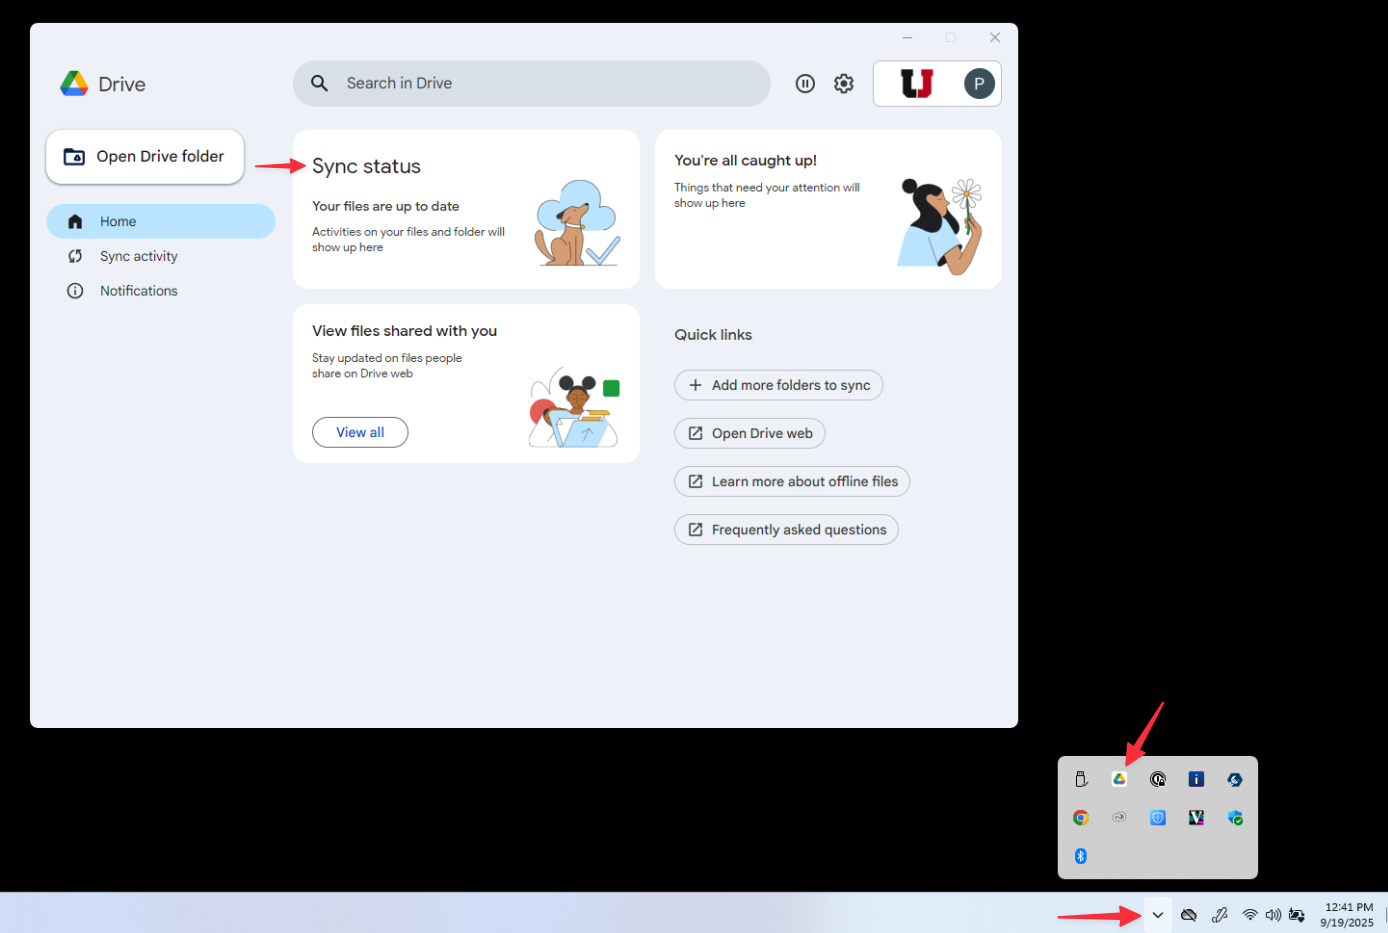
It is important to know what is happening 'behind the scenes' in this step. A file is being copied from the bus video management server to your computer, and then this file is being copied from your computer to a Google server. You can check on the file upload to Google by using the Google Drive icon in your taskbar, which is shown below. If a file is being synchronized to Google, the time until the upload is complete will be shown in the Sync status section. You must keep your computer powered on and connected to WiFi until the Sync status indicates that the file is uploaded to Google, which is shown as reading Your files are up to date.
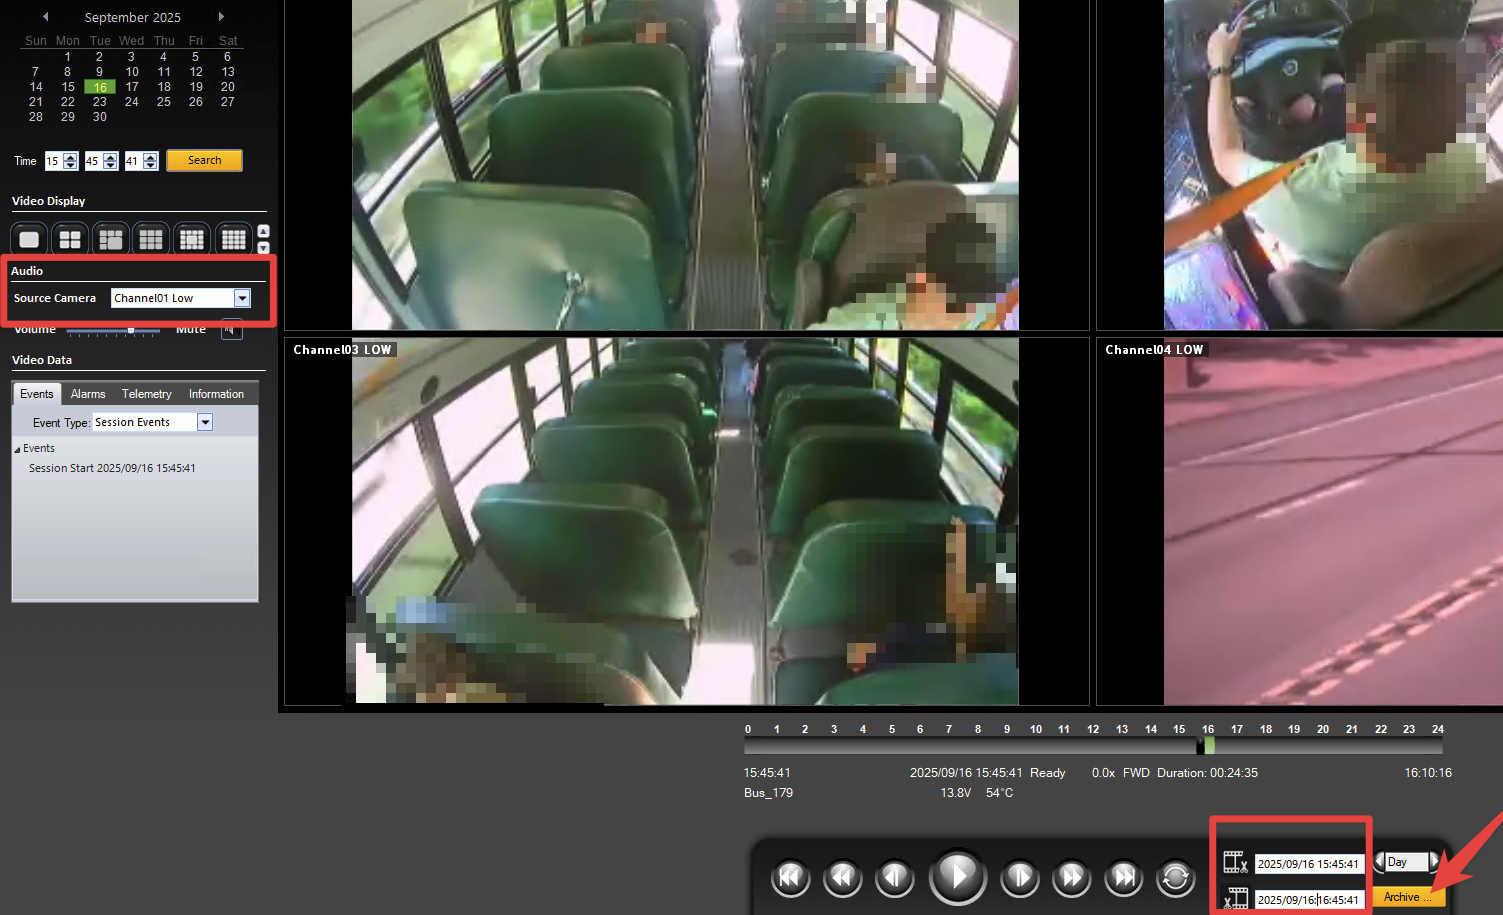
7. Go back to Evidence Request (New), find the incident and click on the Play button icon.

8. Enter the date and time of the video, choose the camera audio needed as part of the incident in the Audio > Source Camera option, then click on the Archive button. In this step, you are downloading another copy of the video and audio in a form that can be viewed and heard on a Mac computer, or a Windows computer that does not have the Safe Fleet bus video viewer software.
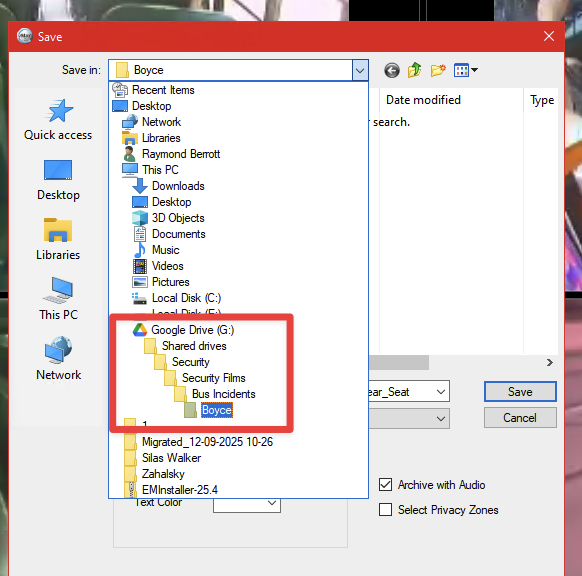
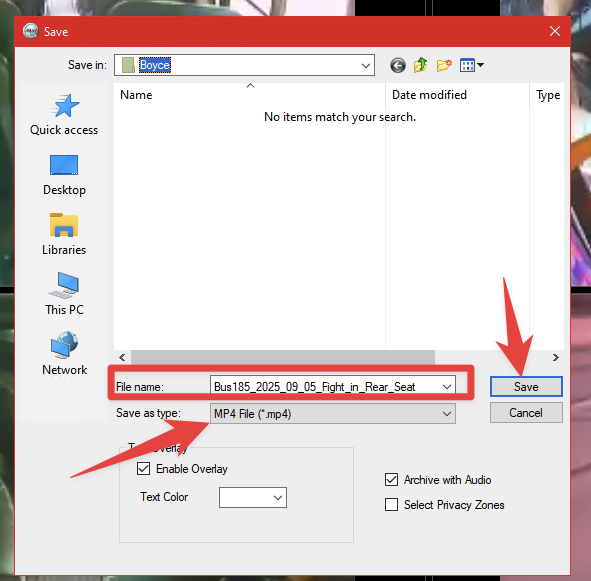
9. Keep the same naming structure for this file as before. Navigate to Shared Drives, Security, Security Films, Bus Incidents, school related to incident, then name the file and choose MP4 as the file type. Now click Save.
BusNumber_Date_Description
Bus185_2025_09_05_Fight_in_Rear_Seat
10. You will NOT have to take extra steps to share video files with principals. After your saved the MP4 file in the appropriate building folder, principals will have access by going to Staff Links
and clicking on the Security Footage icon, or by going directly to: https://go.uscsd.org/security.

The webpage looks as shown below, where principals will select the appropriate folder to access the video.


