 3505
3505
What is Apple Classroom?
Apple Classroom is a classroom management app you can use on your iPad or laptop which will allow you to to guide learning, share work, and manage student devices. You can launch an app or website on any iPad in the class, share documents with your students, see which apps students are working in, and also mute student devices. At the end of class, you can also view a summary of your students’ activities.
Installing Apple Classroom on Your iPad or Laptop
You can install Apple Classroom on your iPad or laptop via Self Service.
Your classes in Apple Classroom are automatically populated from Focus. Open the Classroom app on your iPad or Mac and select the class you want to manage. You will see two classes, one contains your homeroom students, and the other is all students in the grade level in which you teach. You can also create sub-groups from the set of students that are in your classes.
How to View your Classes
Once you open Classroom, you will see two classes available. One is your homeroom and the other is all students in the grade level that you teach. For example, if you choose “Streams - Grade 1”, you will see any 1st grade student within Bluetooth range that is using their iPad.
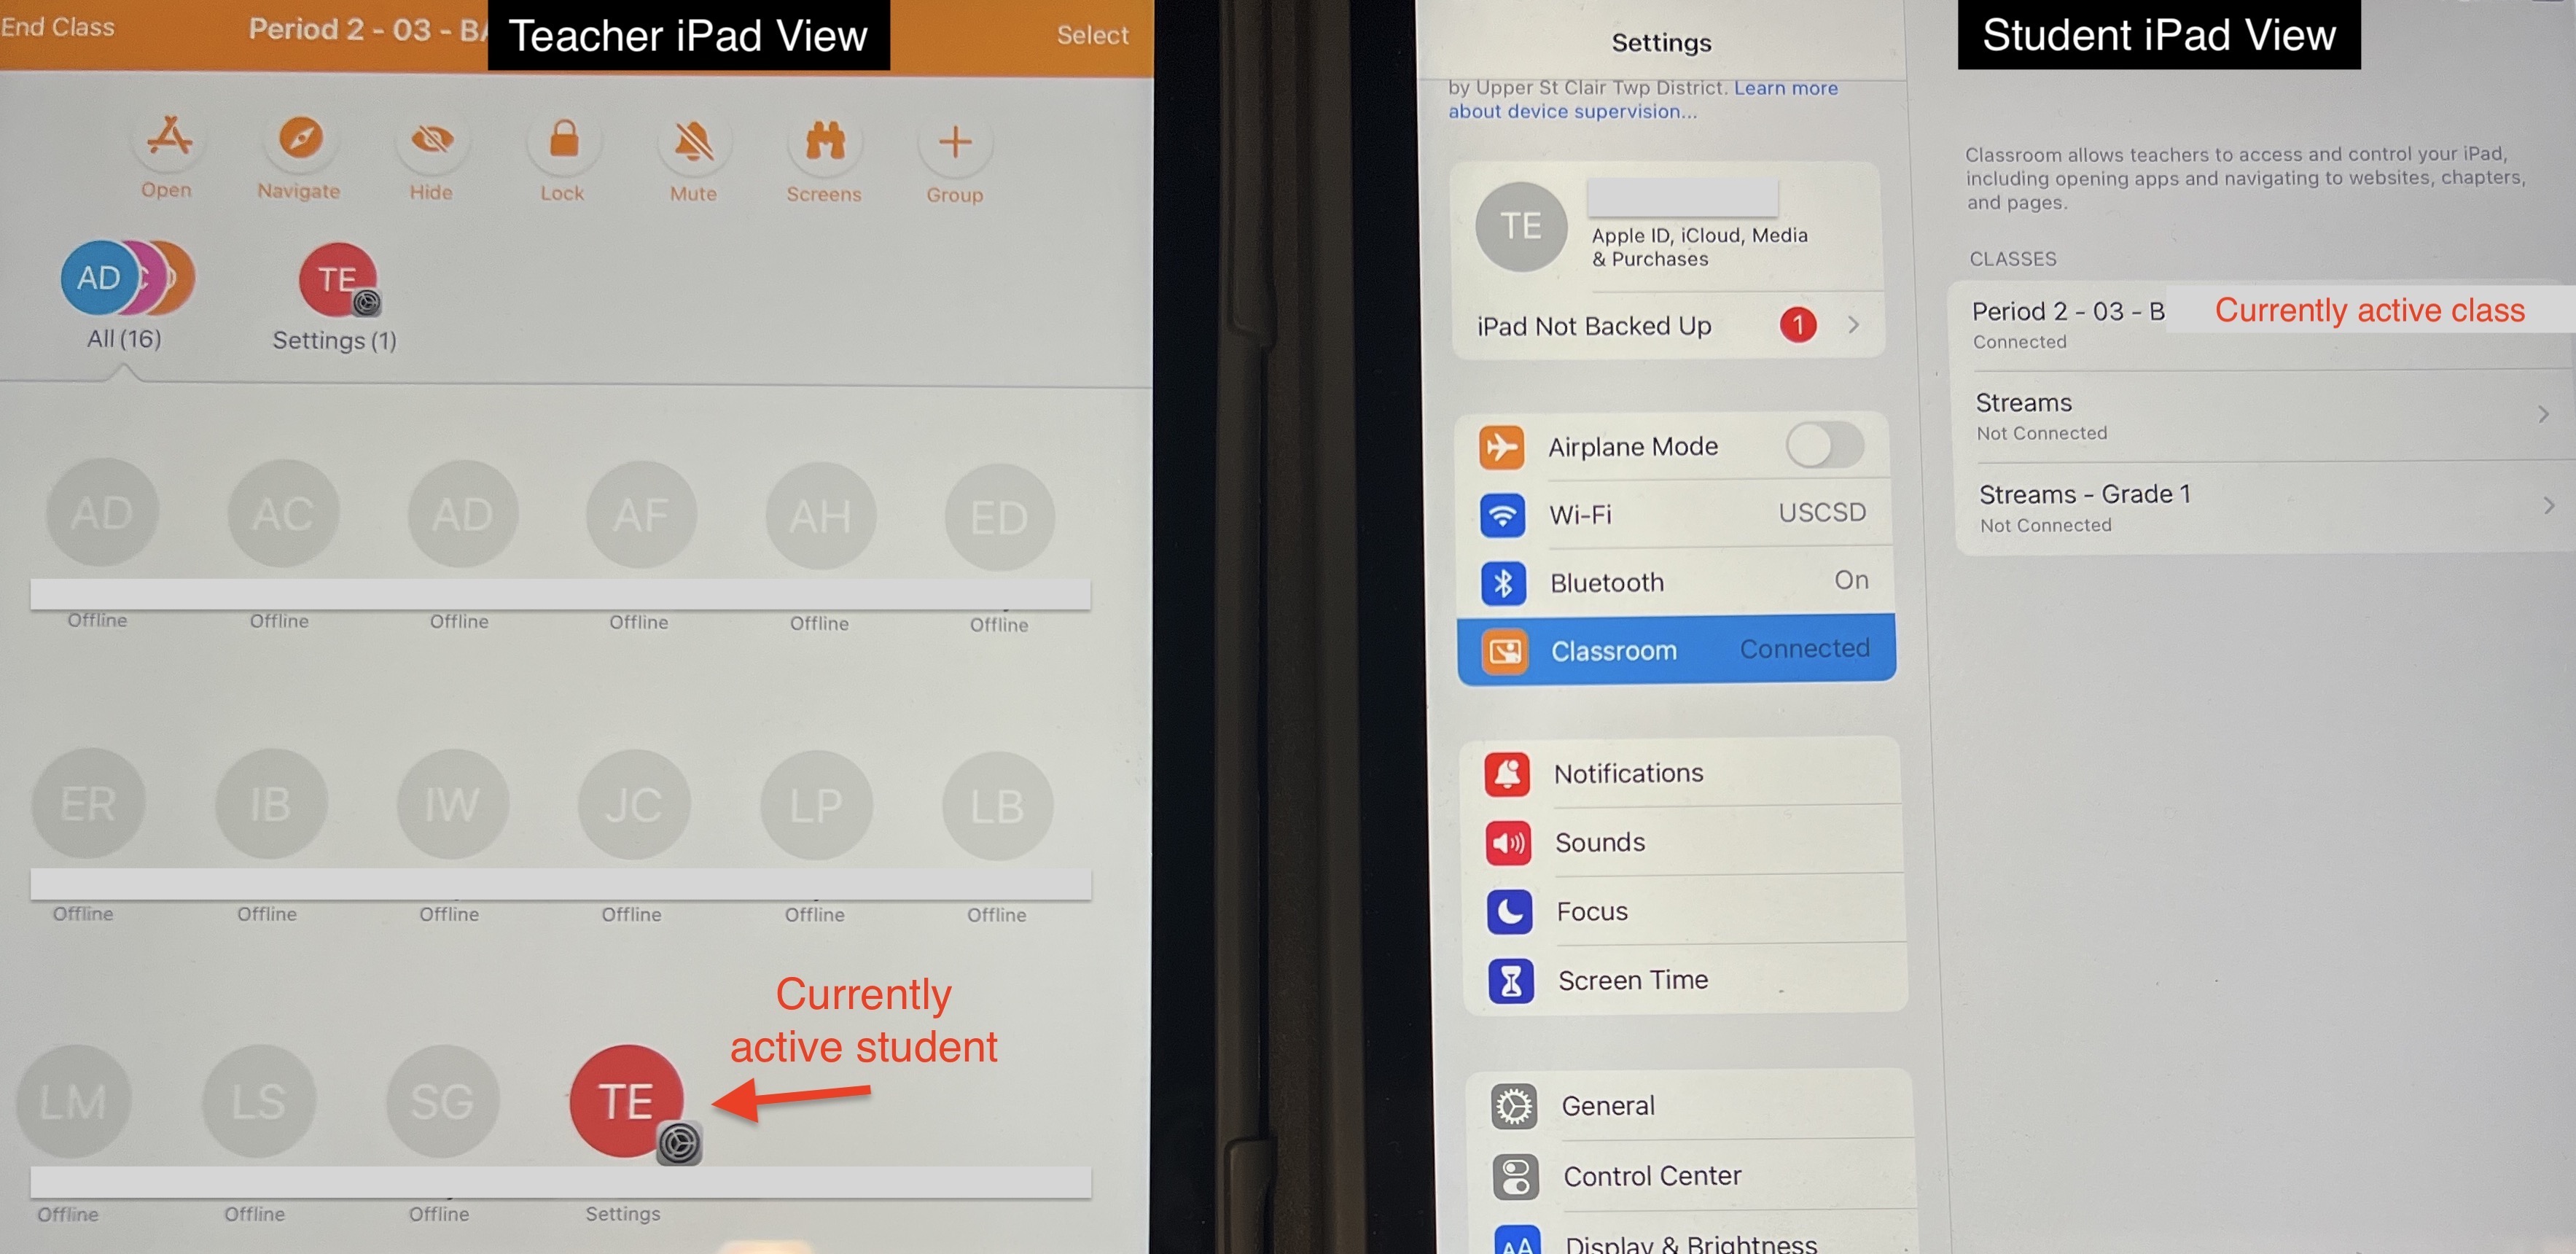
iPad View of Classes

Students can see active classes from their iPad by going into Settings → Classroom

The view of your Classes and Students on your laptop is very similar to the view on your iPad.
Teacher Laptop View of Classes

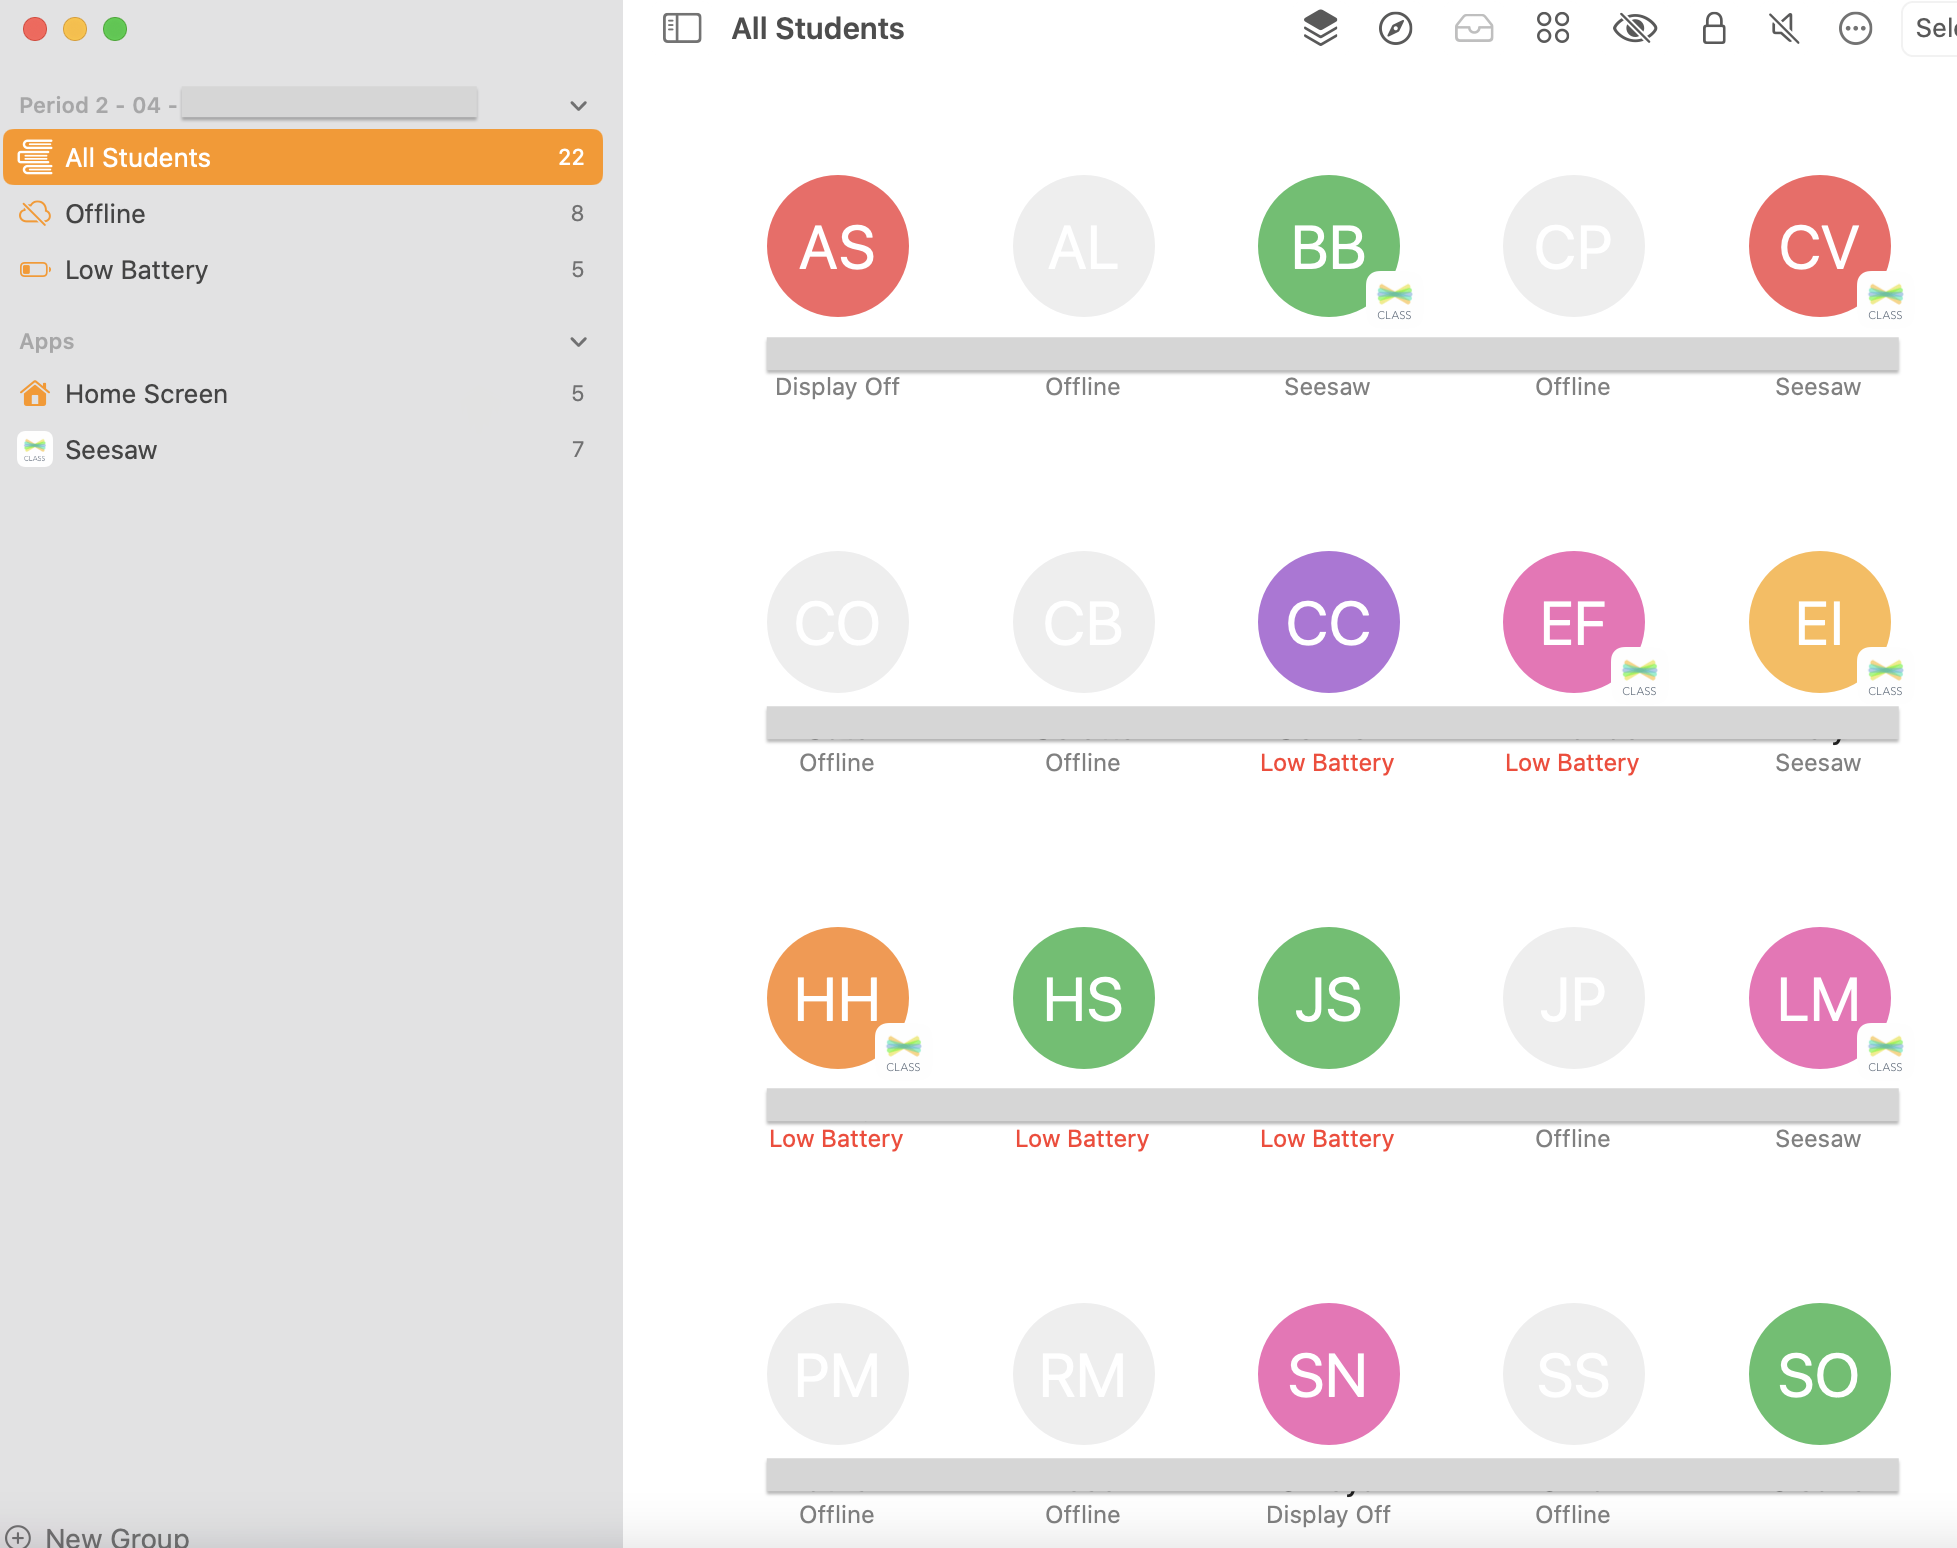
Teacher Laptop View of Students in Your Class
The view of your Students on your laptop is very similar to the view on your iPad.

Creating Student Groups
You may want to create smaller groups of students from the larger groups available to you. This may be useful for activities such as small group projects or Reading Groups.
To create a group on your iPad:
Note that these screenshots were taken from an iPad, but the process to create a group from your laptop is very similar.
In Classroom, select your class (Ex: Streams - Grade 1)
Tap the +Group button.
Enter a name for the group (Ex: Reading), then tap return on the virtual keyboard.
Select each student who will be a member of your new group.
A check mark appears for each student you select.

Tap Done in the upper-right corner of the screen.
The new group now appears in the menu bar.
To Edit a Group you Created
In the Classroom app, select your class and your group.
Tap Edit. On the iPad you can add or remove students.
On the laptop you have a few other options:
Tap the Actions button next to a group, then do one of the following:
Edit the group’s members
Duplicate the group
Rename the group
Delete the group
Follow any necessary prompts to complete the selected action, then tap Done.
Actions You Can Perform on Student Devices
You can perform the following on any number of student devices at once by choosing “All Students” from the sidebar or by selecting a single student. Click the links below to see detailed instructions.
Manage apps (Open an app, hide open apps, lock an app open, share a document from an app)
View and lock students’ screens
How to End your Class
When your class is over, you can end the class by clicking the Actions button, then End Class.
Note: If you forget to unlock a device or an app locked to the screen, it unlocks automatically when out of Bluetooth range or after 20 seconds of no connectivity.
Class Summary
The Class Summary pane appears automatically when you end a class and allows you to view information about each student’s use of their device during the class such as:
-
App usage - What apps were used by the students and the length of time the students used them during class
-
Items shared - Documents or websites shared by the students
-
Student list - The list of students that participated in the class
For more detailed user guides see the Apple support links below:
Classroom User Guide for iPad:
https://support.apple.com/guide/classroom/welcome/ipados
Classroom User Guide for Mac:
https://support.apple.com/guide/classroom/welcome/mac


