7727
7727
This knowledge base article is designed to get you access to Book Creator, have you create a library, and get an invite code you can provide to a student for a library you create. Book Creator has a great knowledge base of support articles as well as a great "Getting Started" knowledge base article. We encourage you to check out Book Creator's "Resource Hub" for temples and implementation ideas. By taking their certification course, you can also become a Book Creator Certified Author.
Getting Started with Book Creator
When you go to bookcreator.com, you must navigate to the Teacher Login page to log in. You can also directly access the Teacher Book Creator login page by going here.
When you go to bookcreator.com, select "Sign into Book Creator" in the upper right corner.

This takes you to the "Student sign in" page. Select "Switch to teacher"

At the "Teacher sign in" page, select "Sign in with Google," and you will be brought to a page where you can select your Google account.

You will be brought to a Google Account selection page. Make sure you select your <username>@uscsd.k12.pa.us account, or you won't get the professional version of Book Creator. You may be asked to allow Book Creator to use this account. Select "Allow" to continue.

You may be asked to provide more information to create your account. Enter the Upper St. Clair School District zip code of 15241, then select your school.

Once in Book Creator, you are brought to your library. To switch to the "Teacher Dashboard," where you can create a library to enable your students to begin creating books, click on the "three lines" in the upper left corner of Book Creator.

Once in the "Teacher Dashboard," select "Create New Library"

Name the library and modify the options if you would like.

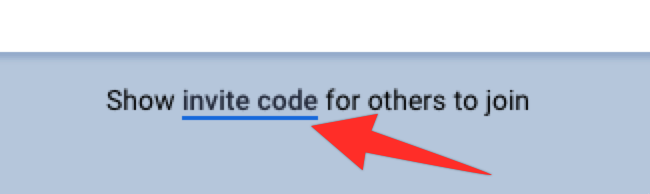
Select your new library, then in the center of the page, select the "Show invite code for others to join" to get a code specific to the library so the students can create a book inside that specific library.