
 266
266
If you have previously backed up your Photos Library to Google Drive as a .zip file, follow these steps to restore your photos to your MacBook. If you need to back up your Photos Library, refer to this Knowledgebase Article.
Locate your photoslibrary.zip file in Google Drive and copy it to the Desktop of your new computer.
Double-click the photoslibrary.zip file to uncompress it. When the process is complete, you will see a file named Photos Library.photoslibrary on your Desktop.

Open a new Finder window and select the Pictures folder. If you do not see the Pictures folder, go to Finder > Settings > Sidebar and check the box next to Pictures.
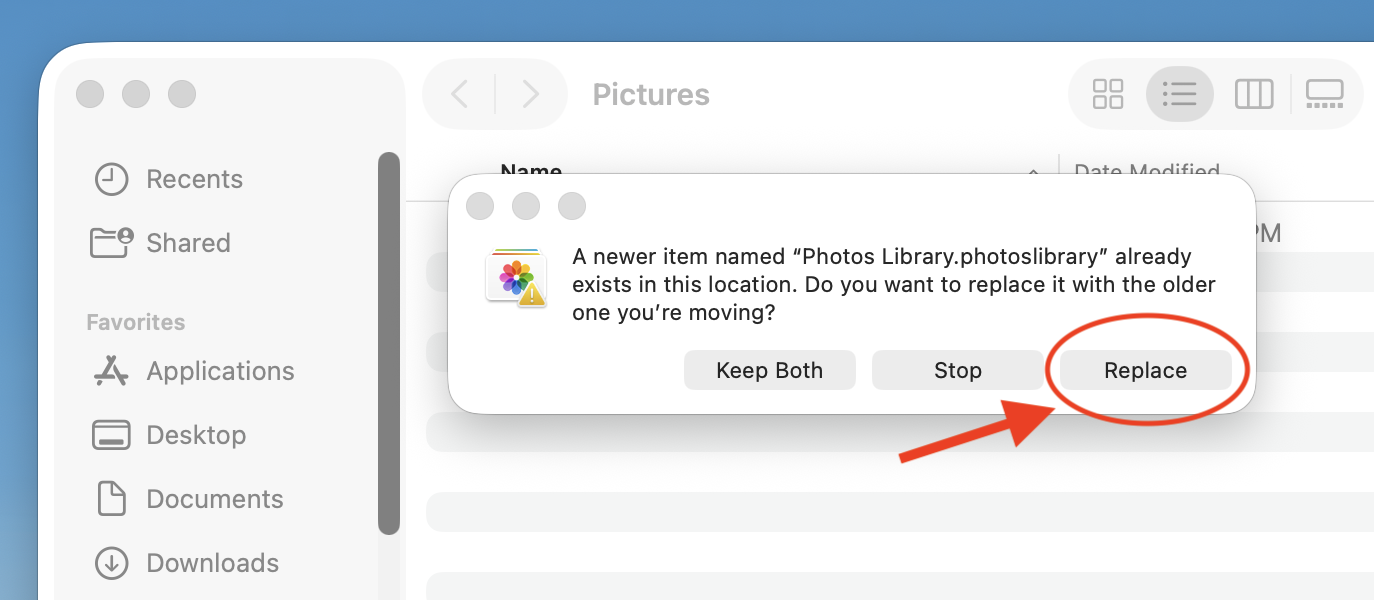
Drag the uncompressed Photos Library.photoslibrary file (not the .zip file) into your Pictures folder. You will see a prompt to replace the existing (empty) Photos Library.photoslibrary file. Choose Replace.
Open the Photos app and confirm that your photos appear correctly.
Once you confirm that your Photos appear correctly, you can delete the photoslibrary.zip file (the compressed file) from your Desktop.

