
 10543
10543
When you sign in to Chrome Sync, your info (such as your bookmarks, browsing history, extensions, and saved passwords) is saved to your Google Account so you can get it whenever you need it. You can see and update your synced info on all your devices. If you change devices (like if you lost your phone or got a new laptop), you'll get all your info back. You'll also sign in automatically to Gmail, YouTube, and other Google services.
Chrome Sync is also a useful tool for backing up your data if you are planning to move to a new device, and it ensures that the data is up to date so you can pick up right where you left off.
There are a couple of different ways that this process can be presented to you, and all are documented below in case your experience varies. The first series of steps is the most common:
Method 1
1. On your computer, open the Google Chrome web browser.
2. In the top right corner, click the icon that looks like a person and then click "Sign in to Chrome".
(If you are already signed in, you will see your picture and email in the window. If you see "Sync is on" with a green checkmark, congrats! You're all set. You can confirm that all of your data is syncing by continuing to step 6. If you don't see "Sync is on", please continue to step 3 below.)

3. Select "Turn on sync...", then log in with your USCSD SSO credentials. (If you are already signed in, you will not be asked to sign in again.) You may be prompted to merge existing Chrome data when signing in. This will associate all of your existing Chrome data with your USCSD Google Account.

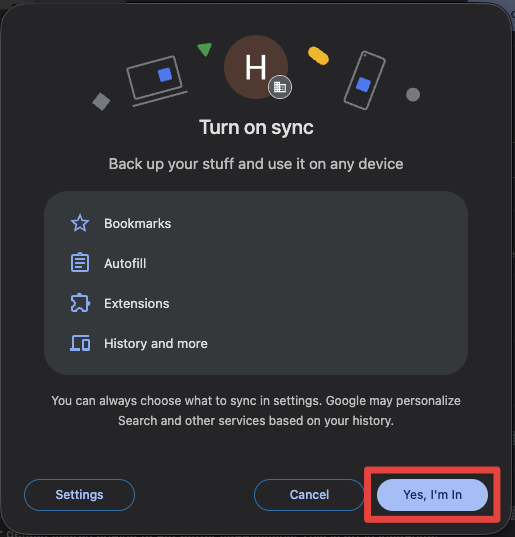
4. Once authenticated with your USCSD SSO credentials, you will be asked if you want to "Turn on sync". Select "Yes, I'm in".
5. If you click back to the top-right corner and select the person icon or your picture, you will see that sync is now enabled.

6. To verify that everything is set to sync, click on "Sync is on", and a Settings tab will open. Select "You and Google" from the left if it isn't already, then "Manage what you sync" under the "Sync" heading.

7. Make sure that "Sync everything" is enabled.

Method 2
This method may be presented to you if you have an account on the student domain but your laptop "lives" on the staff domain, such as in this particular example.
1. On your computer, open the Google Chrome web browser.
2. In the top right corner, click the icon that looks like a person and then click "Sign in to Chrome". (For picture reference, please view step 2's screenshot from Method 1.)
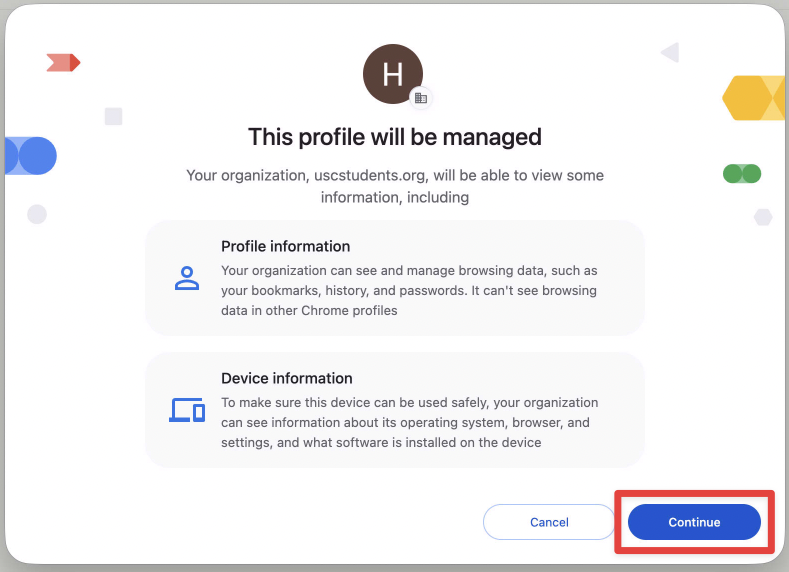
3. You will be presented with a "This profile will be managed" window. Click "Continue".
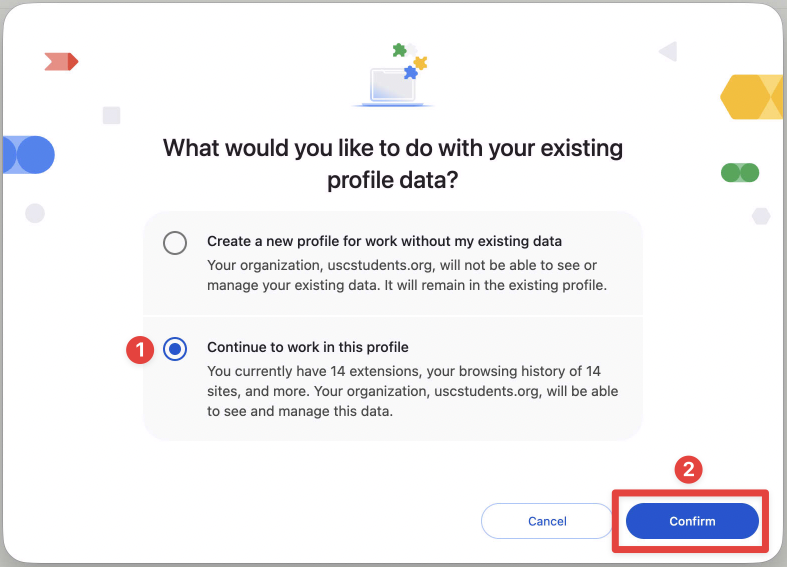
4. You will then be asked "What would you like to do with your existing profile data?" Select "Continue to work in this profile". This will allow you to bring in existing data. Click "Confirm".
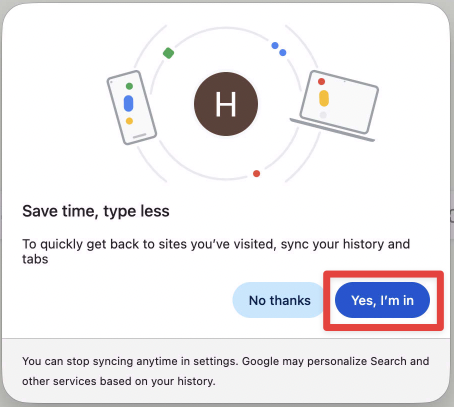
5. Next, you will see a "Save time, type less" window. (This replaces the "Turn on sync" window from Method 1.) Click "Yes, I'm in".
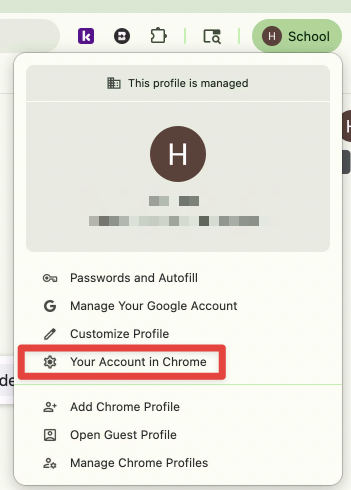
6. Now, if you look in the top right corner, you should see your icon with either a "School" or "Work" label next to it. If you click on it to open the menu, you will not see a "Sync is on" button. Instead, click on "Your Account in Chrome".
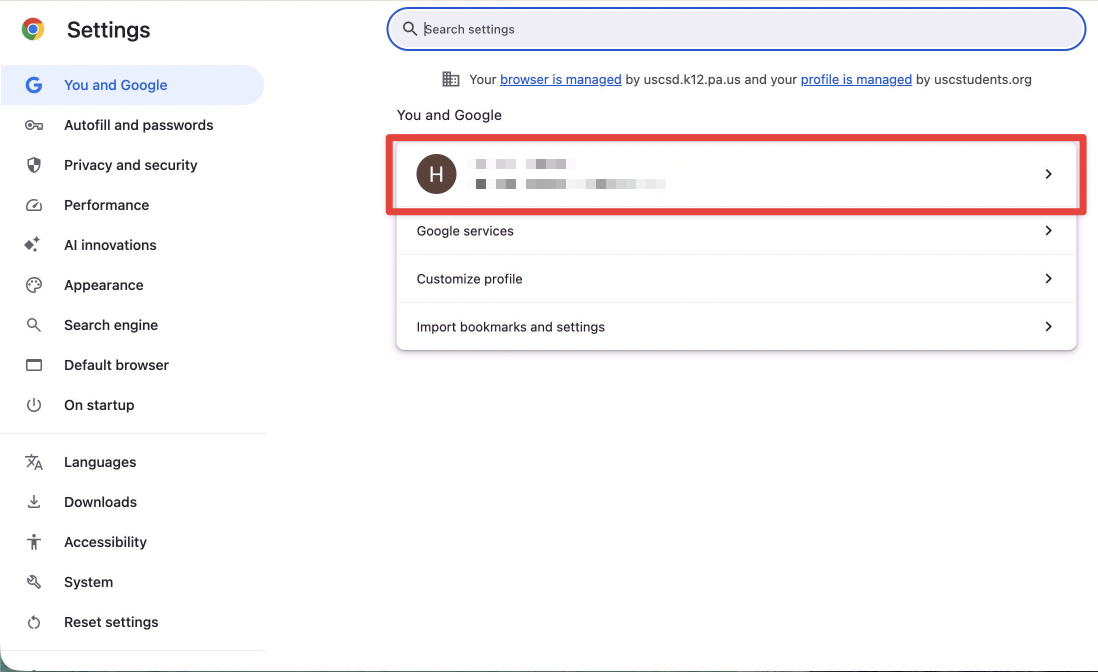
7. A Settings tab will open and take you to the "You and Google" section. Click on your account name under this section.
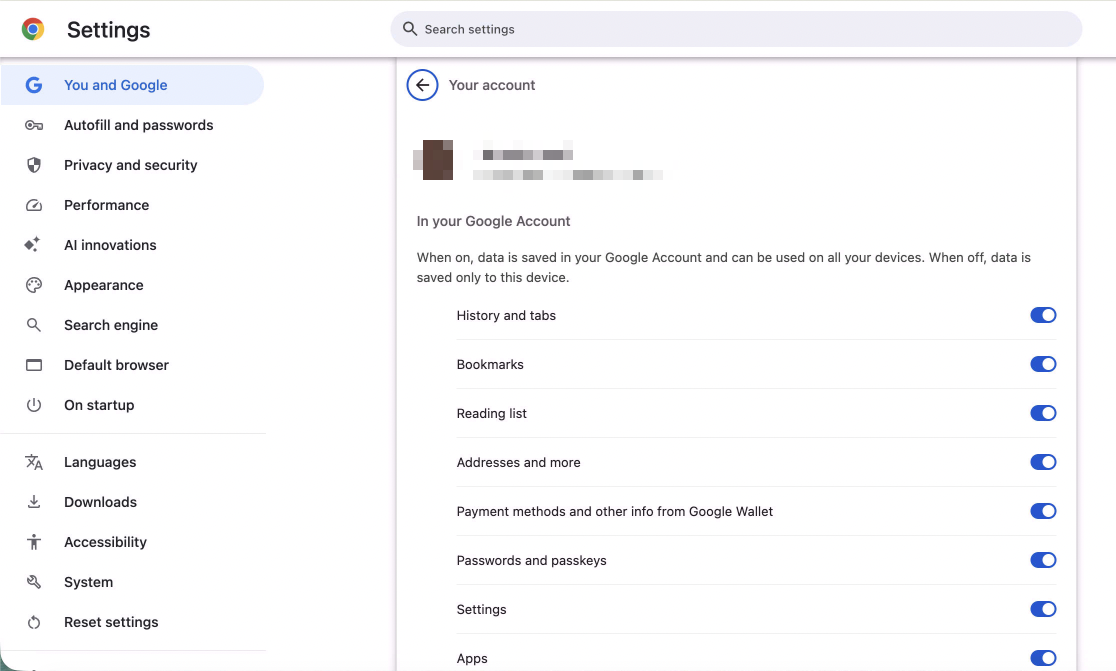
8. This step coincides with step 7 in method 1. If all toggles are on, you are all set, and your data will be synced.
Method 3
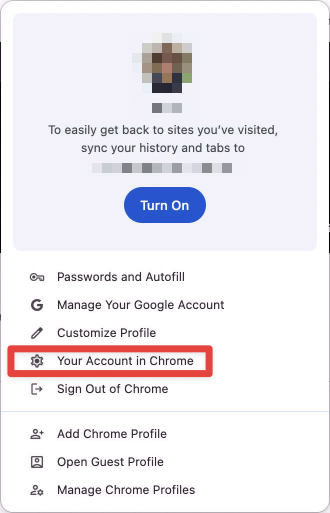
In this particular instance, the user was not able to click the "Turn On" button as it did nothing, but syncing still works. A workaround is provided.
1. On your computer, open the Google Chrome web browser.
2. In the top right corner, click the icon that looks like a person and then click "Sign in to Chrome". (For picture reference, please view step 2's screenshot from Method 1.)
3. After you sign in, instead of "Turn on sync", you will see the following. Instead of clicking "Turn On", click "Your Account in Chrome" below it.
4. This step coincides with step 7 in method 1 and step 8 in method 2. If all toggles are on, you are all set, and your data will be synced.

