
 21933
21933
Starting in the 2023-2024 school year, Kami will replace Squid Notes as the PDF markup and note taking application. It offers many of the same functions as Squid and some new Kami-only features and automatically saves all your Kami documents to your Google Drive.
This article will explain how to use the features in Kami. Please reference this knowledge base article if you still need to set up Kami.
Accessing Kami
You can access Kami from any device with a web browser. If you are on a laptop or Chromebook, we recommend using the Chrome browser when accessing Kami. You can navigate to the website - kamiapp.com, the USCSD Staff Links or Student Links, or the pinned extension at the top of your Chrome browser. The Kami extension is pinned at the top of the Chrome browser for all District-owned devices.

Kami Help Center - Check it out!
Kami has lots of great, detailed information in its help center. This article will reference many of their videos and information. If you need help, try looking for your answer at the Kami help center.
The Kami Dashboard
When you start in the Kami App, you will see the Dashboard.
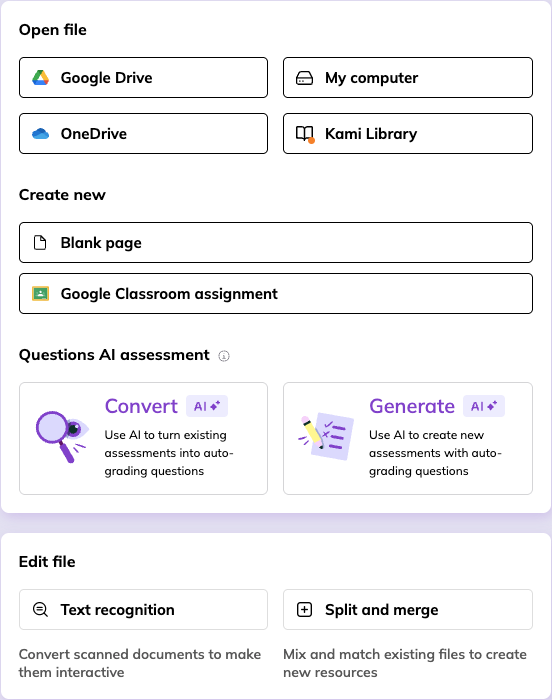
You have several selections available in the Dashboard.
- Open a Google Drive File: Select the “Google Drive” icon and navigate to the file you would like to open.
- Open a Local File on your Device: Select the “My Computer” icon and navigate to the file you want to open in Kami.
- Create a new document: Select the “New Page” icon to open a bank document. Please note that under the “Page type” you can select Blank or several other different common templates or anything from the Kami Library.

You can view this video for more information about the Kami Dashboard.
The Kami Toolbar
You will see the toolbar on the left side of all Kami documents. Many options are available, but you may only see some depending on restrictions placed on the Kami document.
We have highlighted some main tools below, but Kami has a great article explaining all the toolbar features in detail. Click on this link to access that article.
Here is a video explaining the toolbar features.
Below is a picture of the toolbar.

The icons and the names on the toolbar are probably familiar, but we will highlight some main tools below:
Select Tool
-
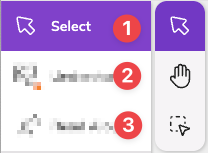
The select tool contains an arrow used to select items in the Kami document. When you select items using the arrow tool, you see a pop-up offering other options for the selected item.
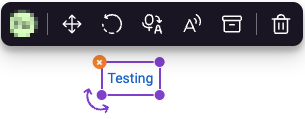
Here is a description of the tools starting from the left
- Direction Arrow - Used to move the selected item around the Kami document
- Rotate Circle - Rotates the item 90 degrees
- Because this is a text box, the voice annotation tool is available
- Read aloud - Read the text in the box
- File Box - Allows you to save this text to the annotation bank
- Trash Can - Deletes the text box
-
The Hand tool allows you to move around the page(s).
-
The Annotation tool allows you to select multiple annotations on your document if there are any.
You can view this video about using all the features of the Select Tools.
Text Box

You use the Text Box tool to create text boxes on your document. You can quickly select the size and color of your text from the sidebar.
Select where you want the text box to appear in your document and click or use your stylus to draw a box. The box will expand to the size of the text you are typing. If needed, you can use the select tool to move or resize the box.
When you are in a text box, you will see font options at the top of your document.

These options allow you to change the typeface, font size, color, spacing, color, highlight, and other options.
Here is a video on using all the text box options.
Drawing (Writing) Tool
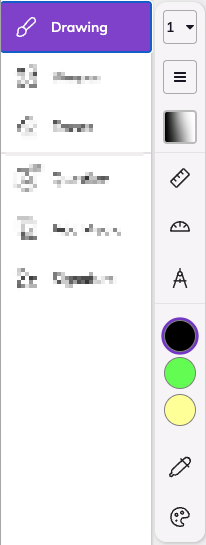
You will use the drawing tool to write on your Kami document. You can draw with your trackpad, or if you are using a device with a touch screen, like a Chromebook, your stylus or finger.
Once you select the drawing tool, customize how you want it to look using the options next to it.
If you need to make changes to the drawing, use the select tool to select the drawing and use the drawing pop-up to make any changes.

Here is a description of the tools starting from the left
- Direction Arrow - Used to move the selected item around the Kami document
- Color Picker - Allows you to change the color of the lines
- Line Size - You can change the thickness of the line
- Opacity - You can change the opacity of the lines
- Line Style - Allows you to change the style of the line, including adding arrows and dashes
- File Box - Allows you to save this text to the annotation bank
- Trash Can - Deletes the text box
If you hold the <shift> key down while drawing, you can draw a straight line.
Here is a video on using all the features of the drawing tool.
Shapes Tool
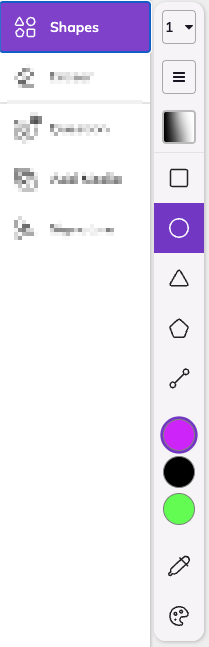
The Shapes tool allows you to draw different shapes in your Kami document. Select the shape you want to draw, then the options like line size, line type, and color. Once your options are selected, draw the shape on your document. If the shape needs to be moved or modified, select the shape using the select tool, and use the pop-up to change the shape options.
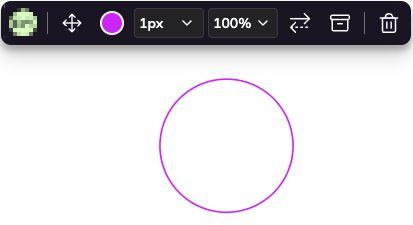
Here is a description of the tools starting from the left
- Direction Arrow - Used to move the selected item around the Kami document
- Color Picker - Allows you to change the color of the lines
- Line Size - You can change the thickness of the line
- Opacity - You can change the opacity of the lines
- Line Style - Allows you to change the style of the line, including adding arrows and dashes
- File Box - Allows you to save this text to the annotation bank
- Trash Can - Deletes the text box
If you hold down the <shift> key when you draw your shape, it will draw it a perfect shape.
Here is a video on how to use all the shape tool features.
Eraser Tool
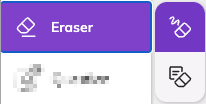
You use the top eraser tool to remove any shapes or drawing elements on your Kami document and the bottom eraser to remove any item in your Kami document.
Here is a video on how to use all the eraser tool options.
Menu Bar

The Kami menu bar is located at the top of every Kami document. It allows you to do specific actions to your full Kami document. We are highlighting the numbered options below, but please see this video for details about the full menu bar.
- Sidebar - This feature allows you to view thumbnails of all pages in a multi-page Kami document, as well as an outline, table of contents, and annotations.
- Uploads - This displays the current location of your file and allows you to change both the file's name and location.
- File Status - Lets you know if your file is saved, syncing, or is offline.
- Undo and Redo - Used to undo and redo your last actions
- File - Use this to access file actions like creating new files, opening files, and accessing annotations
- View - Allows you to view the document in different modes, like presentation, annotation, or screen masking
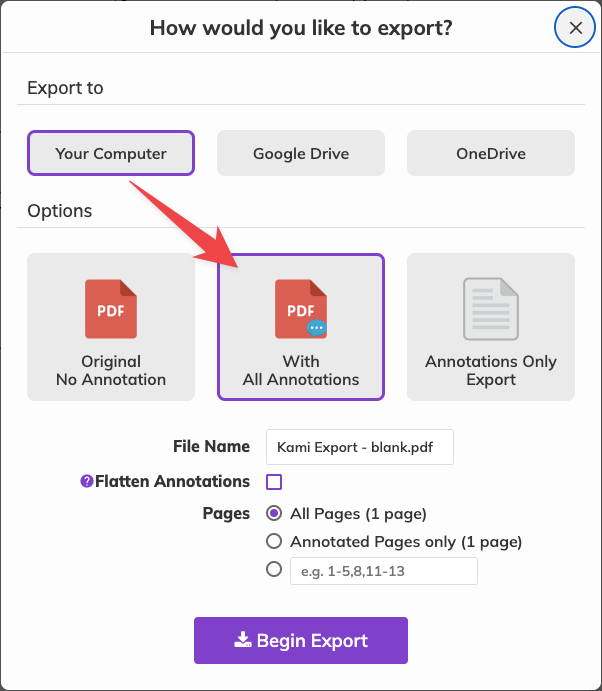
- Export - This feature allows you to export, download, or print your Kami document. Once you choose Export, you MUST choose “PDF with All Annotations” to have everything in your Kami document exported. Select “Begin Export” to export your Kami Document.
8. Tools - Allows you to access the split and merge and run tex recognition features
9. Search - This allows you to search for text in your document.
10. Share Document - Use this feature to share your Kami document with a collaborator and change sharing permissions
If you have any questions or need further explination on Kami features, check out the Kami Help Center.

