
 5456
5456
How does Feature Control work?
Feature Control in the assignment settings lets you toggle on/off tools and features that your students can access when they open the Kami assignment.
Any changes to your Feature Control settings will automatically update for students, so you have the option to modify it before or after you create the assignment.
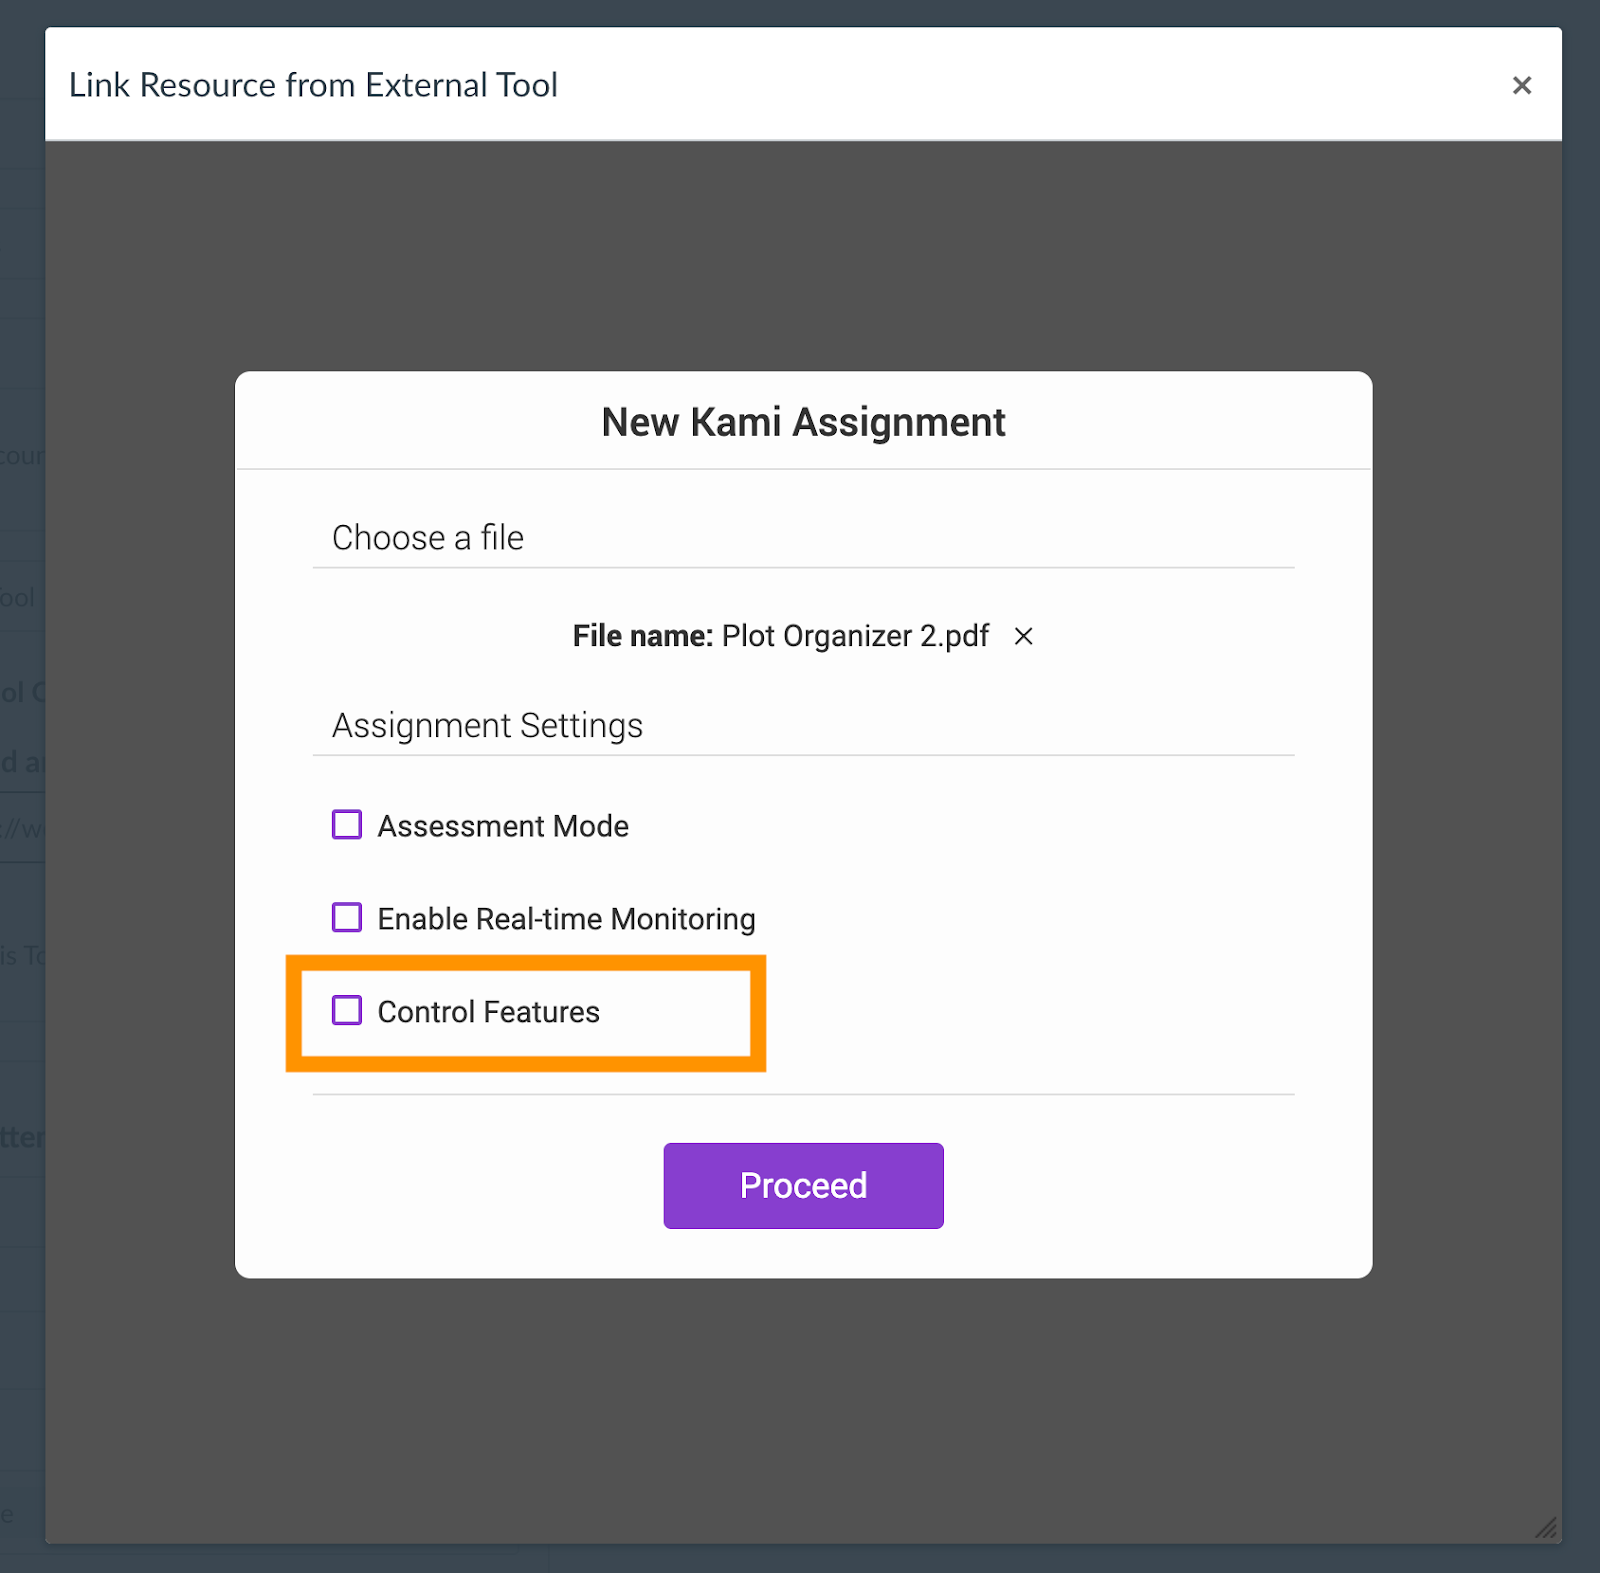
Using Feature Control with Canvas
- Create a Kami assignment as usual.
- Once you’ve filled out the fields, click the Control Features checkbox.
- Toggle on/off tools and features, before you click OK to save.
- Click Proceed to push the assignment with Feature Control enabled.

All Toolbar Features Explained
Kami has a great article about the toolbar features, and this knowledge base article offers an overview of the toolbar features. There is a description of all toolbar features below.
The Select Tools
These tools allows you to interact with the file without creating annotations. This is mainly used for copying and pasting text from the page.
- Select - This tool functions just like your mouse cursor. You can use this tool to select annotations and to access more controls.
- Hand Tool - This tool is for page navigation. Click and hold to move the page around.
- Select Annotations - This tool is for highlighting multiple annotations at the same time. You can select, copy, and delete the selected annotations.
The Dictionary Tool
This tool allows you to select a word that you would like to see defined. [Only available in English]
The Read Aloud Tool
This Tool will read the text you highlight out loud. The reading speed and volume are adjustable and you can load in other voice packs for compatibility with reading non-English languages.
The Mark-Up Tools
Text Highlighter - The Text Highlighter Tool gives you the ability to highlight behind a selection of text.
- How to use: Ensure the Text Highlighter is selected, and then click, or click and drag over a selection of text to change the color.
- Things to keep in mind: If you find that you are not able to select text on the page, please use the Text Recognition Tool. If you are still having issues with the text after running the Text Recognition tool on the document, there is also a workaround of using the box highlighter over the top of the page which is free-hand and less accurate.
Freehand Highlighter - The Freehand Highlighter Tool gives you the ability to freehand draw with a highlighter anywhere on the page just like a real highlighter.
- How to use: Ensure the Freehand Highlighter tool is selected, then click and drag over a section of the page to add a highlight.
Box Highlighter - The Box Highlighter is similar to the Freehand Highlighter in the same way you can use it freely on your document where you please. However, instead of the Box Highlighter acting as a pen, you have to click and drag from one point to another and this will create a box.
- How to use: Ensure the Freehand Highlighter tool is selected, then click and drag over a section of the page to add a highlight.
Strike-through Tool - The Strike-through Tool allows you to strike through text. This is most useful for those editing or proofreading a document.
- How to use: Ensure the Strike-through tool is selected, then click and drag over the text you wish to annotate.
- Things to keep in mind: The Strike-through Tool will only work on the embedded text on the document itself and not inserted text boxes that have been added.
The Underline Tool - The underline tool can be used to help emphasize a point or draw attention to the area.
- How to use: Ensure the Underline tool is selected, then click and drag over the text you wish to annotate.
- Things to keep in mind: If you want to have a section of text be both highlighted and underlined, the best method for that is to underline the word or sentence first THEN highlight it.
Comment Tools
Text Comments - The most straightforward comments to create are text comments. Great for quickly jotting down thoughts.
- How to use: Click the Comment tool > Text Comment, you can either anchor a comment to a static point on the page by clicking on any part of the page or by simply clicking and dragging over a passage of text on the page.
- Things to keep in mind: There is a Voice Typing button to the right of the comment box, this allows you to toggle between standard keyboard input and transcribing your voice into a Text Comment. This can be a very useful assistive tool for students that have trouble with writing or typing out answers and notes.
- You are able to embed hyperlinks into Text Comments to reference external sites and resources.
- If you find that you are not able to select text on the page, please use the Text Recognition Tool.
Voice Comments - This comment type is handy if you need to record a raw audio clip rather than typing or transcribing using the Voice Typing function (covered in the section above).
- How to use: Click the Comment tool > Voice Comment, as with the other comments; you can either anchor an Audio Comment to a static point on the page by clicking on any part of the page or by simply clicking and dragging over a passage of text on the page.
- Things to keep in mind: When using the Voice Comments for the first time you will often be prompted to allow Audio permissions.
Video Comments - This comment type is useful when your students might need to see something in person, but are unable to. This comment can also be useful for subjects where in-person demonstrations are crucial, such as learning an instrument.
- How to use: Click the Comment tool > Video Comment, you can either anchor a Video Comment to a static point on the page by clicking on any part of the page or by simply clicking and dragging over a passage of text on the page.
- To pause press the red recording button on the comment and to submit, press 'Done'.
- Things to keep in mind: When using the Video Comment tool for the first time you will often be prompted to allow Video permissions.
Screen Capture Comments - This Screen Capture Comment becomes handy when you have a whiteboarding lesson that needs to be recorded for future reference to aid your students. This comment could also be useful if your students need to display their working out in real-time during a test.
- How to use: Click the Comment tool > Screen Capture Comment, you can either anchor a Screen Capture Comment to a static point on the page by clicking on any part of the page or by simply clicking and dragging over a passage of text on the page.
- Things to keep in mind: When using the screen Capture Comment for the first time you will often be prompted to allow Audio and Video permissions if these have not been granted before by the other comments.
Text Box Tool
This tool allows you to place text boxes anywhere in their document, perfect for filling in forms. Both the color and size of the text can be adjusted as needed.
Equation Tool
This tool allows you to create equations by using the symbols palette.
Drawing Tool
This tool allows for freehand drawings to be placed anywhere on the document, perfect for drawing attention to key ideas for emphasis. The stroke thickness and transparency can be adjusted.
This can be used to make perfectly straight lines by holding Shift before drawing the line.
Shape Tools
This tool allows you to draw shapes on your document. This tool is ideal for marking areas that need to be quickly recognised. The size, color, and transparency of the shapes can be adjusted.
Eraser Tool
You can use the eraser tool to erase shapes, text, signatures, and drawings that have been made onto your PDF. To use the eraser tool, simply click and drag over the annotation that you wish to remove.
There are two versions of the Eraser Tool:
- All Annotations - This clears any annotations made to the document. Note: This will not erase highlights caused by inserting a text comment on selected text.
- Drawing and Shapes Only - This ignores highlights, strikethrough/underlined text, comments and text boxes.
Add Media Tool
Add in different types of media to your Kami document, the following are the types of media you can insert:
- From Computer
- From Camera (pictures or videos)
- From Google Drive
- Using Google Image Search
- Using One Drive
- Add YouTube videos
- Graphic Organizers
- Stickers
Signature Tool
This is used to upload and store your signature to sign PDF files quickly. You can also Draw a signature on touch devices.
Hover over the Signature tool and it will show previous signatures to quickly add to your document.

